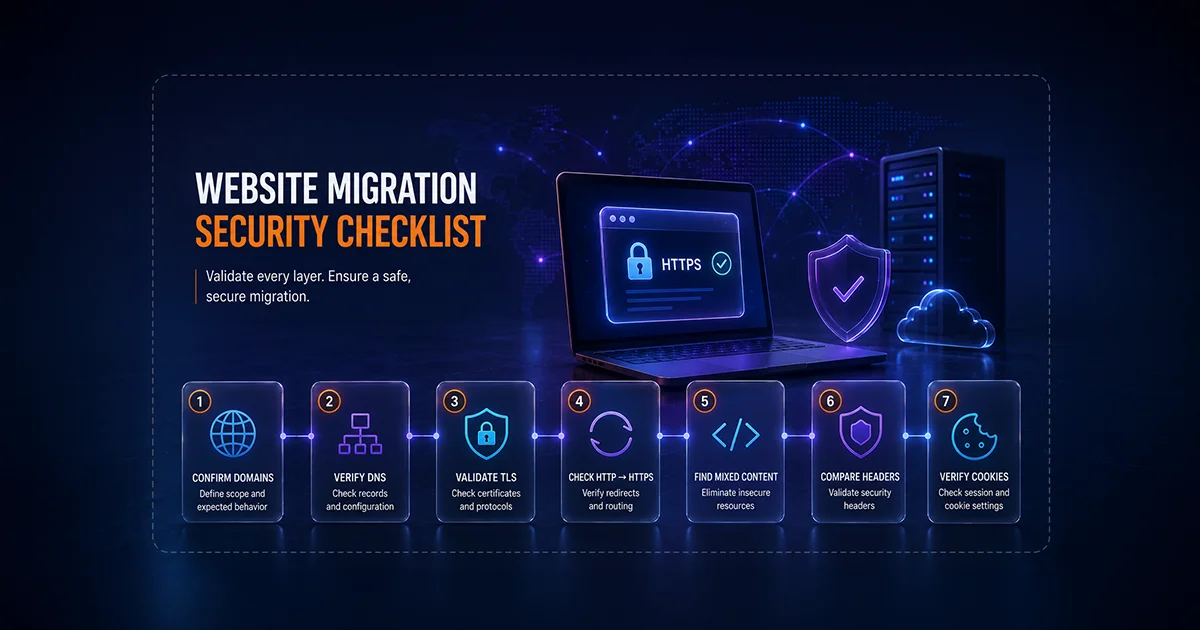
Website migrations create security problems in places teams do not always think to test. The application may work, pages may load, and analytics may receive traffic, yet the new environment can still have weaker TLS, missing headers, stale HTTP resources, exposed backups, incorrect DNS records, insecure cookies, or a redirect path that sends users through an old host.
A migration changes more than content. It can change the DNS provider, hosting platform, CDN, reverse proxy, certificate automation, web server, application runtime, deployment process, path structure, and third-party integrations. Every changed layer is a place where a previously working security control can disappear or behave differently.
The safest approach is to validate the public website in a deliberate order. Start with routing and transport. Then verify browser controls, sessions, exposed files, and application behavior. Finish with broader vulnerability testing and ongoing monitoring. Only assess websites you own or are authorized to test.
Step 1: Confirm the intended domains and migration scope
List every hostname that should work after the migration. Include the primary domain, www variant, application hostname, API host, checkout domain, regional names, and any old hostname expected to redirect to the new service.
For each hostname, define the expected result:
- Serve the new application over HTTPS.
- Redirect to the canonical production hostname.
- Remain temporarily available during transition.
- Be retired and stop serving content.
This prevents an old site from being forgotten simply because the new homepage works.
Step 2: Verify live DNS records
DNS should be checked first because later tests depend on reaching the intended infrastructure. Confirm A and AAAA addresses, CNAMEs, authoritative nameservers, MX records where mail is relevant, TXT records, and CAA policy.
Use Vulnify's DNS Record Lookup to inspect what public resolvers can see. Compare the result with the migration plan rather than assuming any resolving address is the right address.
Look for old server addresses, unexpected CNAME targets, nameservers belonging to the previous provider, accidental mail-record changes, and CAA records that no longer represent the certificate authority being used.
DNS caches follow TTL behavior, so during a live cutover you may need to check more than one resolver or location before concluding that every user is reaching the new environment.
Step 3: Validate TLS and certificates
A migration often changes where HTTPS terminates. The old host may have handled TLS directly, while the replacement uses a CDN or load balancer. The new platform may issue certificates automatically. These changes can produce hostname, trust-chain, expiry, or protocol differences.
Run Vulnify's SSL Checker against every important HTTPS hostname. Confirm the certificate is trusted, covers the requested hostname, and has an appropriate remaining lifetime. When protocol and cipher detail matters, use TLS Deep Analysis.
Do not forget old hostnames that remain reachable. If an old domain redirects users to the new one, it still needs a working HTTPS path when users arrive through an old bookmark, search result, or external link.
Step 4: Check HTTP to HTTPS behavior
Every production entry point should have an intentional HTTP policy. For most public websites, plaintext HTTP should redirect cleanly to the appropriate HTTPS destination.
Migration problems frequently include HTTP redirecting to an old domain first, HTTP and HTTPS versions serving different content, loops between the CDN and origin, temporary redirect rules that were never cleaned up, and redirects that lose paths or query parameters.
Use the Redirect Chain Checker to review the actual route a user follows. Test the homepage and representative deep links.
Step 5: Find mixed content
Mixed content is common after a migration because database fields, themes, CSS files, and third-party widgets can retain absolute http:// references. MDN defines mixed content as resources requested insecurely from a securely loaded page. Modern browsers may automatically upgrade some resource types and block others, but the correct long-term fix is to serve required resources securely and update the references.
Run Vulnify's Mixed Content Checker against representative pages. Prioritize scripts and styles, then images, media, downloads, and other insecure references.
Fix the source of the stale URL in the CMS, database, theme, code, or third-party configuration. Changing only the currently rendered page can allow the same problem to return later.
Step 6: Compare security headers
Security headers frequently disappear during infrastructure migration because they were configured in the old server, CDN, or reverse proxy rather than in application code.
Run the Security Headers Analyzer and compare the live response with the intended policy. Review Content-Security-Policy, Strict-Transport-Security, framing controls, X-Content-Type-Options, Referrer-Policy, and Permissions-Policy where relevant.
If CSP changed, use the CSP Checker for directive-level review. If HSTS changed, use the HSTS Checker before applying broad includeSubDomains or preload-related settings.
Always verify the final public response. Correct application middleware can still be changed by the new edge layer.
Step 7: Verify cookie and session behavior
Authentication cookies can behave differently after a migration because TLS termination, hostname, SSO, framework configuration, and application paths have changed.
Use the Cookie Security Checker on login, account, and checkout flows. Review sensitive cookies for appropriate Secure, HttpOnly, and SameSite behavior.
Also inspect Domain and Path scope. A cookie that was previously restricted to app.example.com can accidentally become available to .example.com after configuration changes. That broadens which sibling hosts receive the cookie.
Test the real application flow after adjusting cookies. SSO, third-party payments, and embedded services can genuinely require cross-site behavior.
Step 8: Check exposed files, backups, and administrative routes
Migrations generate temporary artifacts. Teams create database exports, archives, copied environment files, old release folders, installer directories, and diagnostic endpoints. If those files are placed below the public web root, they can become a direct data exposure.
Use Vulnify's Exposed Paths Checker to review common sensitive locations. Prioritize configuration files, source-control metadata, database exports, backup archives, debugging endpoints, and administrative interfaces.
OWASP's configuration and deployment testing guidance specifically identifies default files, debug functionality, old backup files, and unreferenced artifacts as areas that deserve security review. Remove material that is not required rather than relying on difficult-to-guess filenames.
Step 9: Verify HTTP methods after platform changes
A new reverse proxy, API gateway, framework, or hosting platform can change how HTTP methods are routed. An endpoint may begin accepting PUT, PATCH, DELETE, OPTIONS, or another method the old platform rejected.
Use the HTTP Methods Checker on representative routes. These methods are not automatically vulnerabilities, but the methods exposed by each endpoint should match the application's design and authorization rules.
Step 10: Review CORS after hostname changes
CORS configuration often contains explicit frontend origins. When an application moves to a new hostname, teams sometimes temporarily replace a narrow allowlist with broad wildcard or reflection behavior simply to make browser requests work.
Use the CORS Checker against changed API routes. Confirm allowed origins and credential behavior match real business requirements.
CORS does not replace API authentication or authorization. It controls browser cross-origin behavior, not whether a caller is entitled to access sensitive data.
Step 11: Verify robots.txt and sitemap configuration
Robots and sitemap files are primarily crawl and indexing controls, but migrations can leave old domains, staging URLs, or obsolete paths inside them.
Run Vulnify's Robots and Sitemap Checker to confirm crawl rules and sitemap URLs match the new production environment.
Never use robots.txt as a security control. A disallowed URL remains publicly reachable unless the server protects it separately.
Step 12: Review public technology disclosure
A new platform can expose different server banners, framework identifiers, generator metadata, and CDN fingerprints. Disclosure alone is usually lower priority than a real exploitable vulnerability, but unexpected stack signals can help identify migration mistakes.
Use the Website Technology Fingerprint to review the new public stack. Remove unnecessary disclosure where practical, but prioritize patching vulnerable software over merely hiding version numbers.
Step 13: Run a broader website security scan
Focused checks verify individual controls, but they do not represent a complete application assessment. Once DNS, transport, headers, sessions, and obvious exposures are stable, run the Website Security Scanner against the authorized production origin.
A broader scan can assess multiple categories such as injection, XSS, exposed paths, redirects, browser headers, TLS, cookie configuration, CORS, technology disclosure, and other public application risks across discovered routes and parameters.
Select the scan depth according to application complexity, business sensitivity, and the assurance required after migration.
Step 14: Compare the new environment with the previous baseline
If you have a pre-migration report, compare it with the new public state. The goal is not necessarily identical results because the architecture may have changed. The goal is to explain meaningful differences.
Ask whether any security control disappeared, any public path appeared, TLS became weaker, cookie scope broadened, redirects became more complex, new technologies became visible, or older vulnerabilities were successfully removed.
Document the answers so the new production environment becomes the next known-good baseline.
Step 15: Monitor after cutover
Migrations do not end when DNS is switched. Caches expire, certificates renew, teams make rapid follow-up changes, and old infrastructure is gradually removed. Some drift appears only after the immediate cutover period.
Vulnify's Website Watch provides a daily pulse for selected public-origin signals plus a weekly Standard or Deep scan. It can help identify later changes to headers, TLS, mixed content, redirects, and common exposed paths after the initial migration review.
Website migration security checklist
DNS
[ ] Correct A, AAAA, CNAME, NS, MX, TXT, and CAA records
[ ] Old infrastructure records removed where appropriate

TLS
[ ] Valid certificate on every intended HTTPS hostname
[ ] Correct hostname coverage and trust
[ ] HTTP redirects cleanly to HTTPS

Browser controls
[ ] Security headers match intended policy
[ ] CSP reviewed after script and hostname changes
[ ] No unintended mixed content

Sessions
[ ] Sensitive cookies use appropriate Secure, HttpOnly, SameSite
[ ] Cookie Domain and Path are not broader than required

Public surface
[ ] No exposed backups, debug files, source-control metadata, or installers
[ ] HTTP methods match endpoint design
[ ] CORS matches legitimate allowed origins
[ ] Technology disclosure reviewed

Routing
[ ] Canonical redirects are correct
[ ] robots.txt and sitemap reference the production site

Validation
[ ] Broader authorized vulnerability scan completed
[ ] New baseline documented
[ ] Ongoing monitoring enabled where appropriate
Common migration security mistakes
Copying old configuration without understanding it
Old server files often contain years of exceptions. Reproducing them blindly can bring outdated controls and unnecessary routes into the new environment.
Fixing browser errors by broadening policies
When CSP or CORS breaks, avoid widening the policy until everything works. Identify the new legitimate origin or resource and permit only what the application actually requires.
Leaving migration backups online
Move database dumps, archives, and configuration exports outside the public web root and remove them when they are no longer needed.
Testing only the homepage
Authentication, checkout, APIs, errors, and legacy redirects may use different infrastructure. Include representative routes in the validation process.
Conclusion
A successful website migration is not simply one where the new site loads. It is one where the new environment preserves or improves the intended security controls. DNS, TLS, redirects, headers, cookies, public paths, CORS, methods, and browser behavior can all change independently of normal application functionality.
Work from the outside in. Verify routing and transport first, then browser controls and sessions, then exposed files and application behavior. Finish with a broader scan and continue observing the origin after cutover. Vulnify's focused security tools, Website Security Scanner, and Website Watch can support those verification stages while your infrastructure and development teams remain responsible for implementing the fixes.